I now have over 80 hours in my new Covert harness. I love the streamlined profile and compact fit; I feel like I’m gliding much better as a result. My longest flight in it to date is 7:01 which wasn’t tough at all. Oh sure, there was some neck pain involved but at this stage of my life (57) I have come to accept the fact that every day there will be pain. My philosophy is to accept the pain and get over it. I put it out of my mind as it is only a distraction that could impact my flying.
I adjusted the harness to make it more comfortable by letting the shoulder straps out all the way as it was a tad too short for my height. This allowed me to relax my legs however the rake on the boot was creating some discomfort in my ankles. My feet were falling asleep on long flights so I would have to tap them frequently especially just before landing to get the feeling back. On my last flight at the Flytec Race and Rally, my feet were still numb on landing and it felt like I had two sprained ankles when I landed. I talked to Jeff shortly after and he sent me instructions on how to modify the boot to change the rake of the foot box and also to allow the shoulder straps to be tightened to a normal position.
I modified the boot before the East Coast Championships and am pleased with the result. Here are the steps for modifying the boot:
1. Remove the retaining screw from the end of the harness and take the boot out of the harness.
2. Untie the bungee cord and remove the door from the boot.
3. Tape a black sharpie flat on the table and spin the boot (pointy side up) flat on the table so that you draw a black line approx. the height of the marker tip (about 1/8" off the table).
5. Use a composite wheel on a Dremel tool and cut off the "ring" (1/8th” line) that your door rests against.
6. Cut off the wedge (2nd line) to take off the length and change the angle.
Ring and wedge removed: Note how the ring is larger than the new circumference of the boot.
7. Tape the "ring" to the boot so that it's centered and the grommets for the door bungy are still clear.
8. Apply 5 minute epoxy (from a 2 barreled syringe) to the seam on the outside of the ring boot interface using a popsicle stick and let it dry.
9. Apply a strip of painters tape on the inside of the boot ½” above the new joint to mask off the area.
10. Mix epoxy resin (30 minute) with micro balloons so that it is the consistency of peanut butter and apply it to the inside of the boot around the seam so that it squeezes through any gaps left from the glue.
11. Use a gloved finger to make a smooth radius or this "peanut butter mix" around the inside edge of your new seam and let it dry.
12. Use the Dremel to trim off the excess from the ring and sand the outer edge smooth.
13. Sand the inside fillet to make sure there aren't any sharp edges to catch your bags.
14. Replace the door and make a mark around the door to cut off the excess. Use the Dremel to cut off the extra (should be about 3/16-1/4") and sand the new edge smooth.
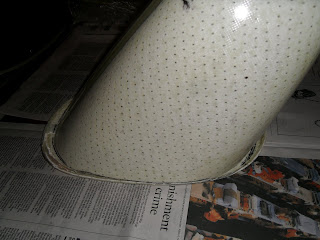
Finished boot sans final sanding.
15. Replace the door and install it back in the harness.
The boot is stronger than the original and is the perfect length and rake for my stature. I have over 20 hours in the new configuration and love the increased comfort! Thanks Jeff for your support!


